Auth0
Configuring a Custom Domain
First step is to configure a custom Domain.
Navigate to the Auth0 Dashboard.
Click Settings in the left panel.
Open the Custom Domain tab.
Configure a custom domain (e.g.,
auth.my-company.com). Make sure it's a sub domain of where your app will be deployed.Copy this (
auth.my-company.com) it is yourissuerUri.

Declaring Your Application
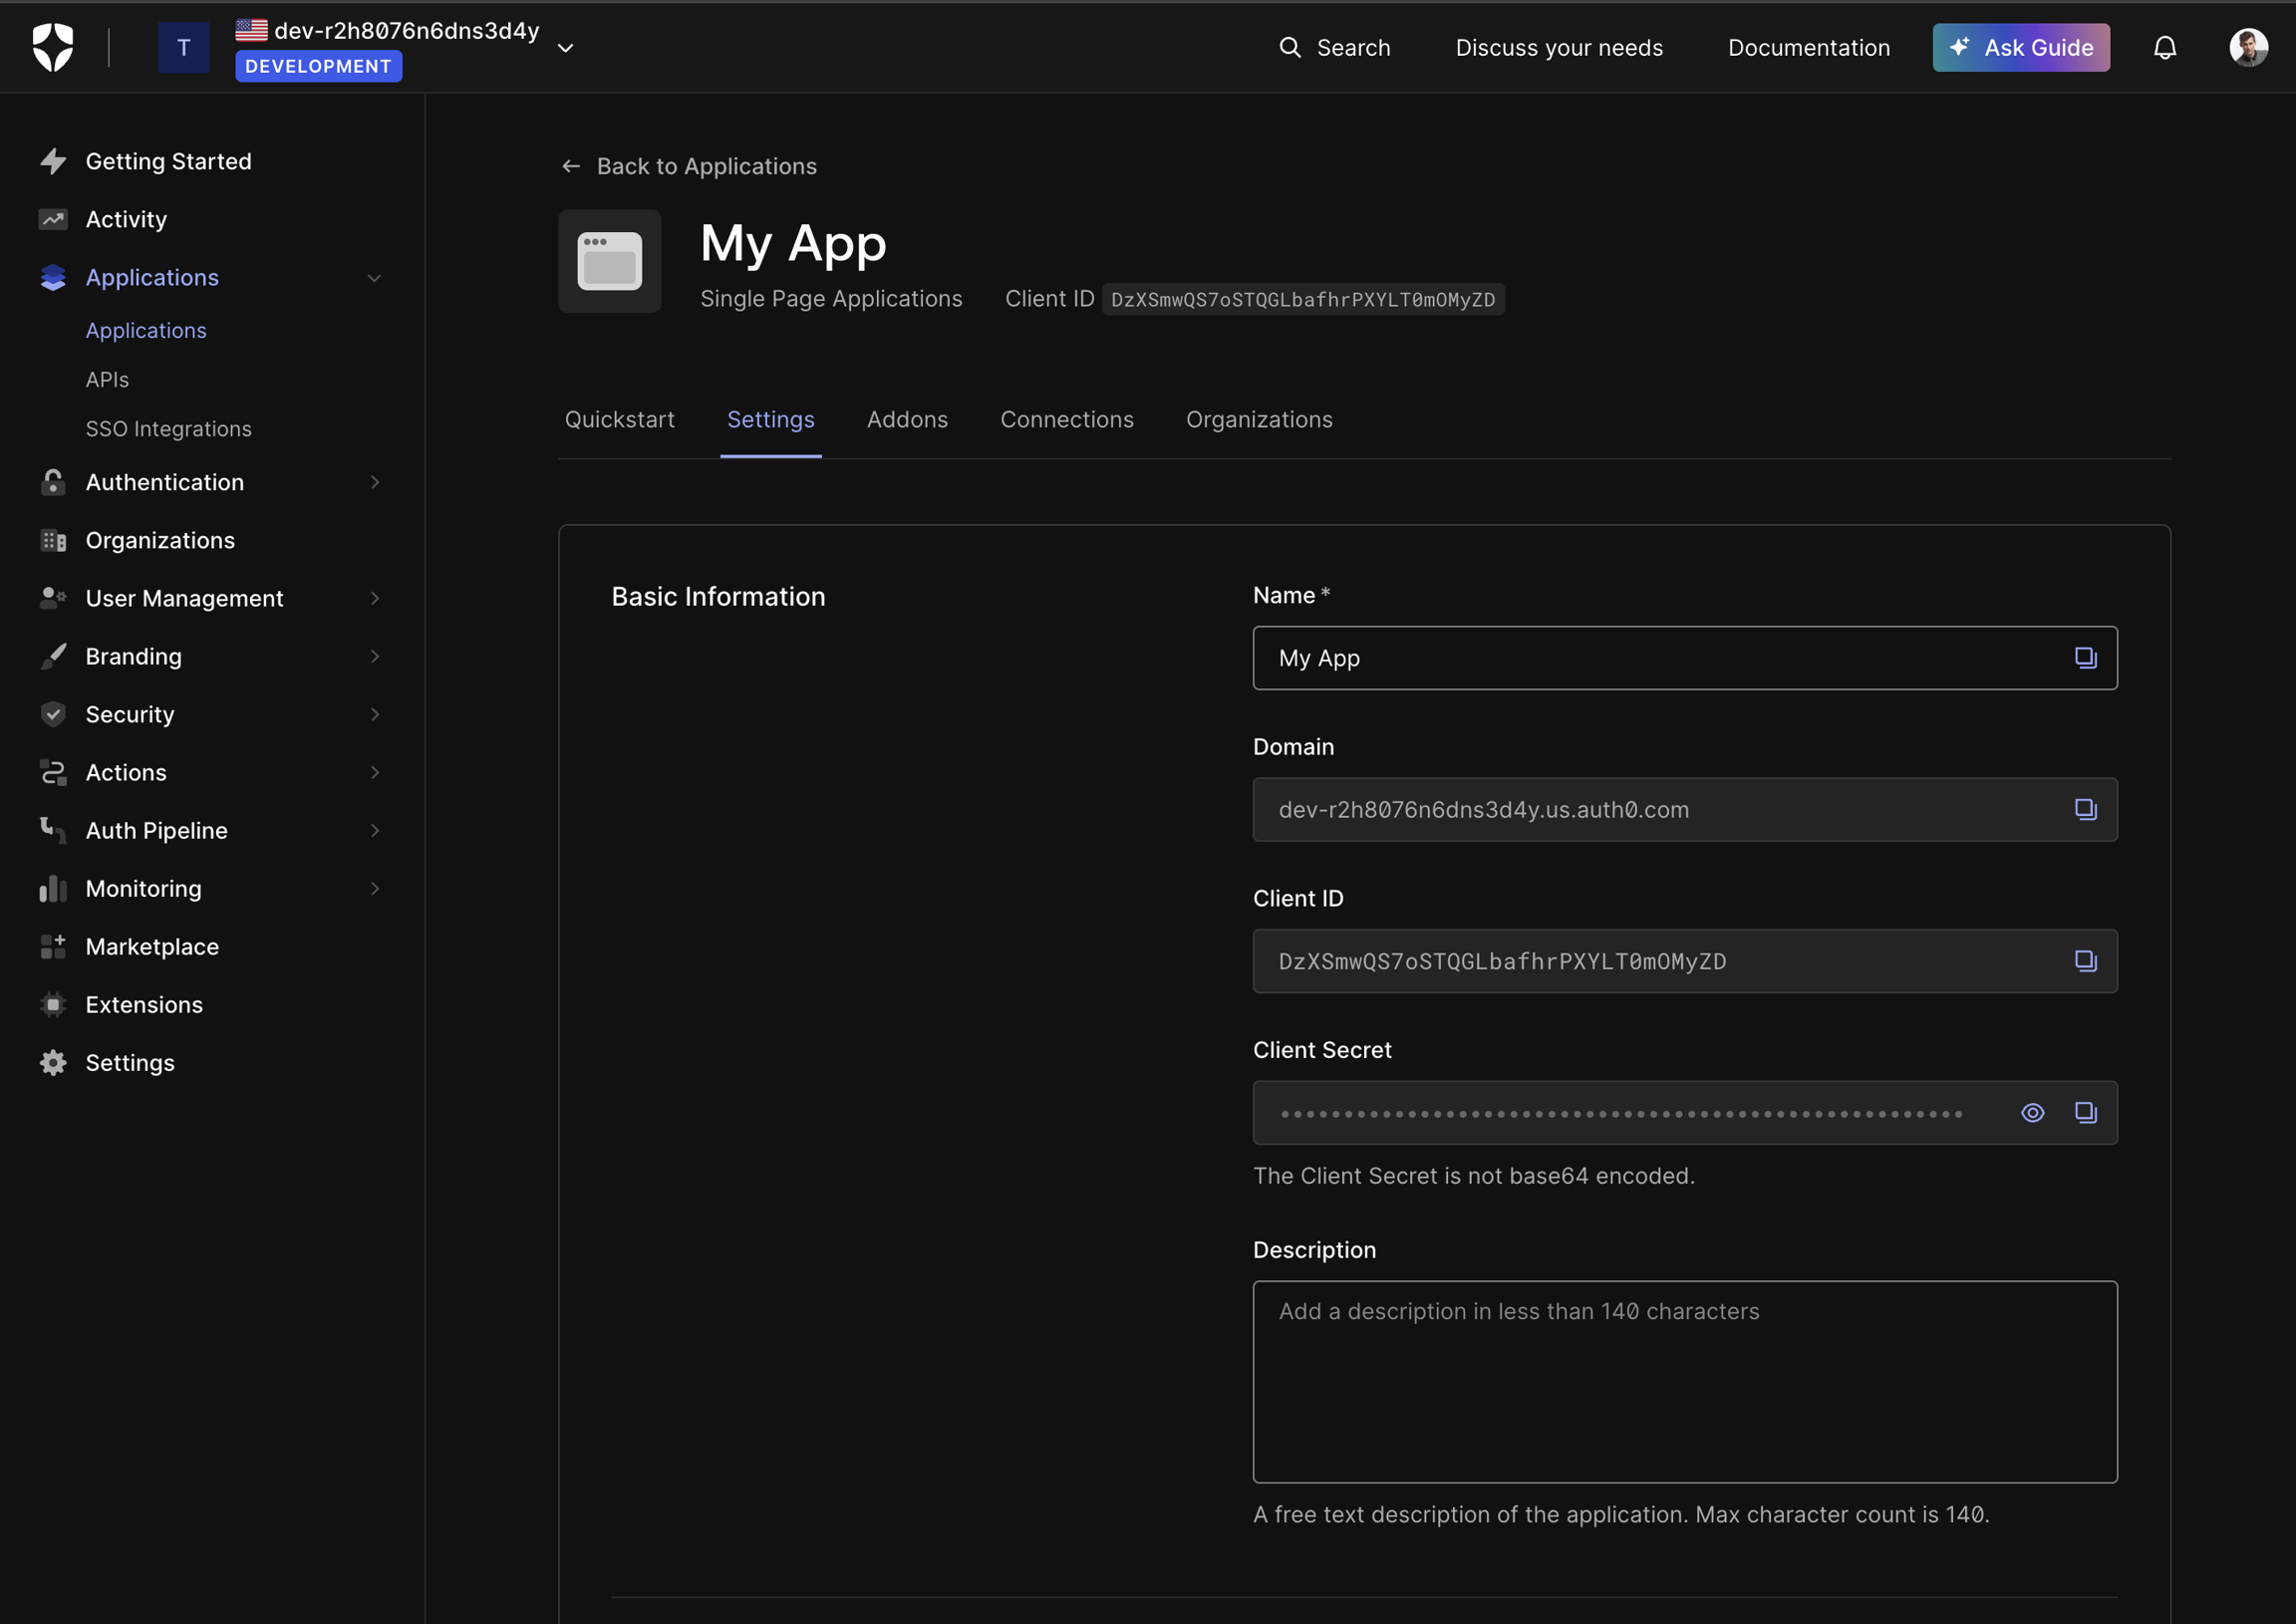
Navigate to Auth0 Dashboard.
In the left panel, go to Applications → Applications.
Click Create Application.
Select Single Page Application as the application type.
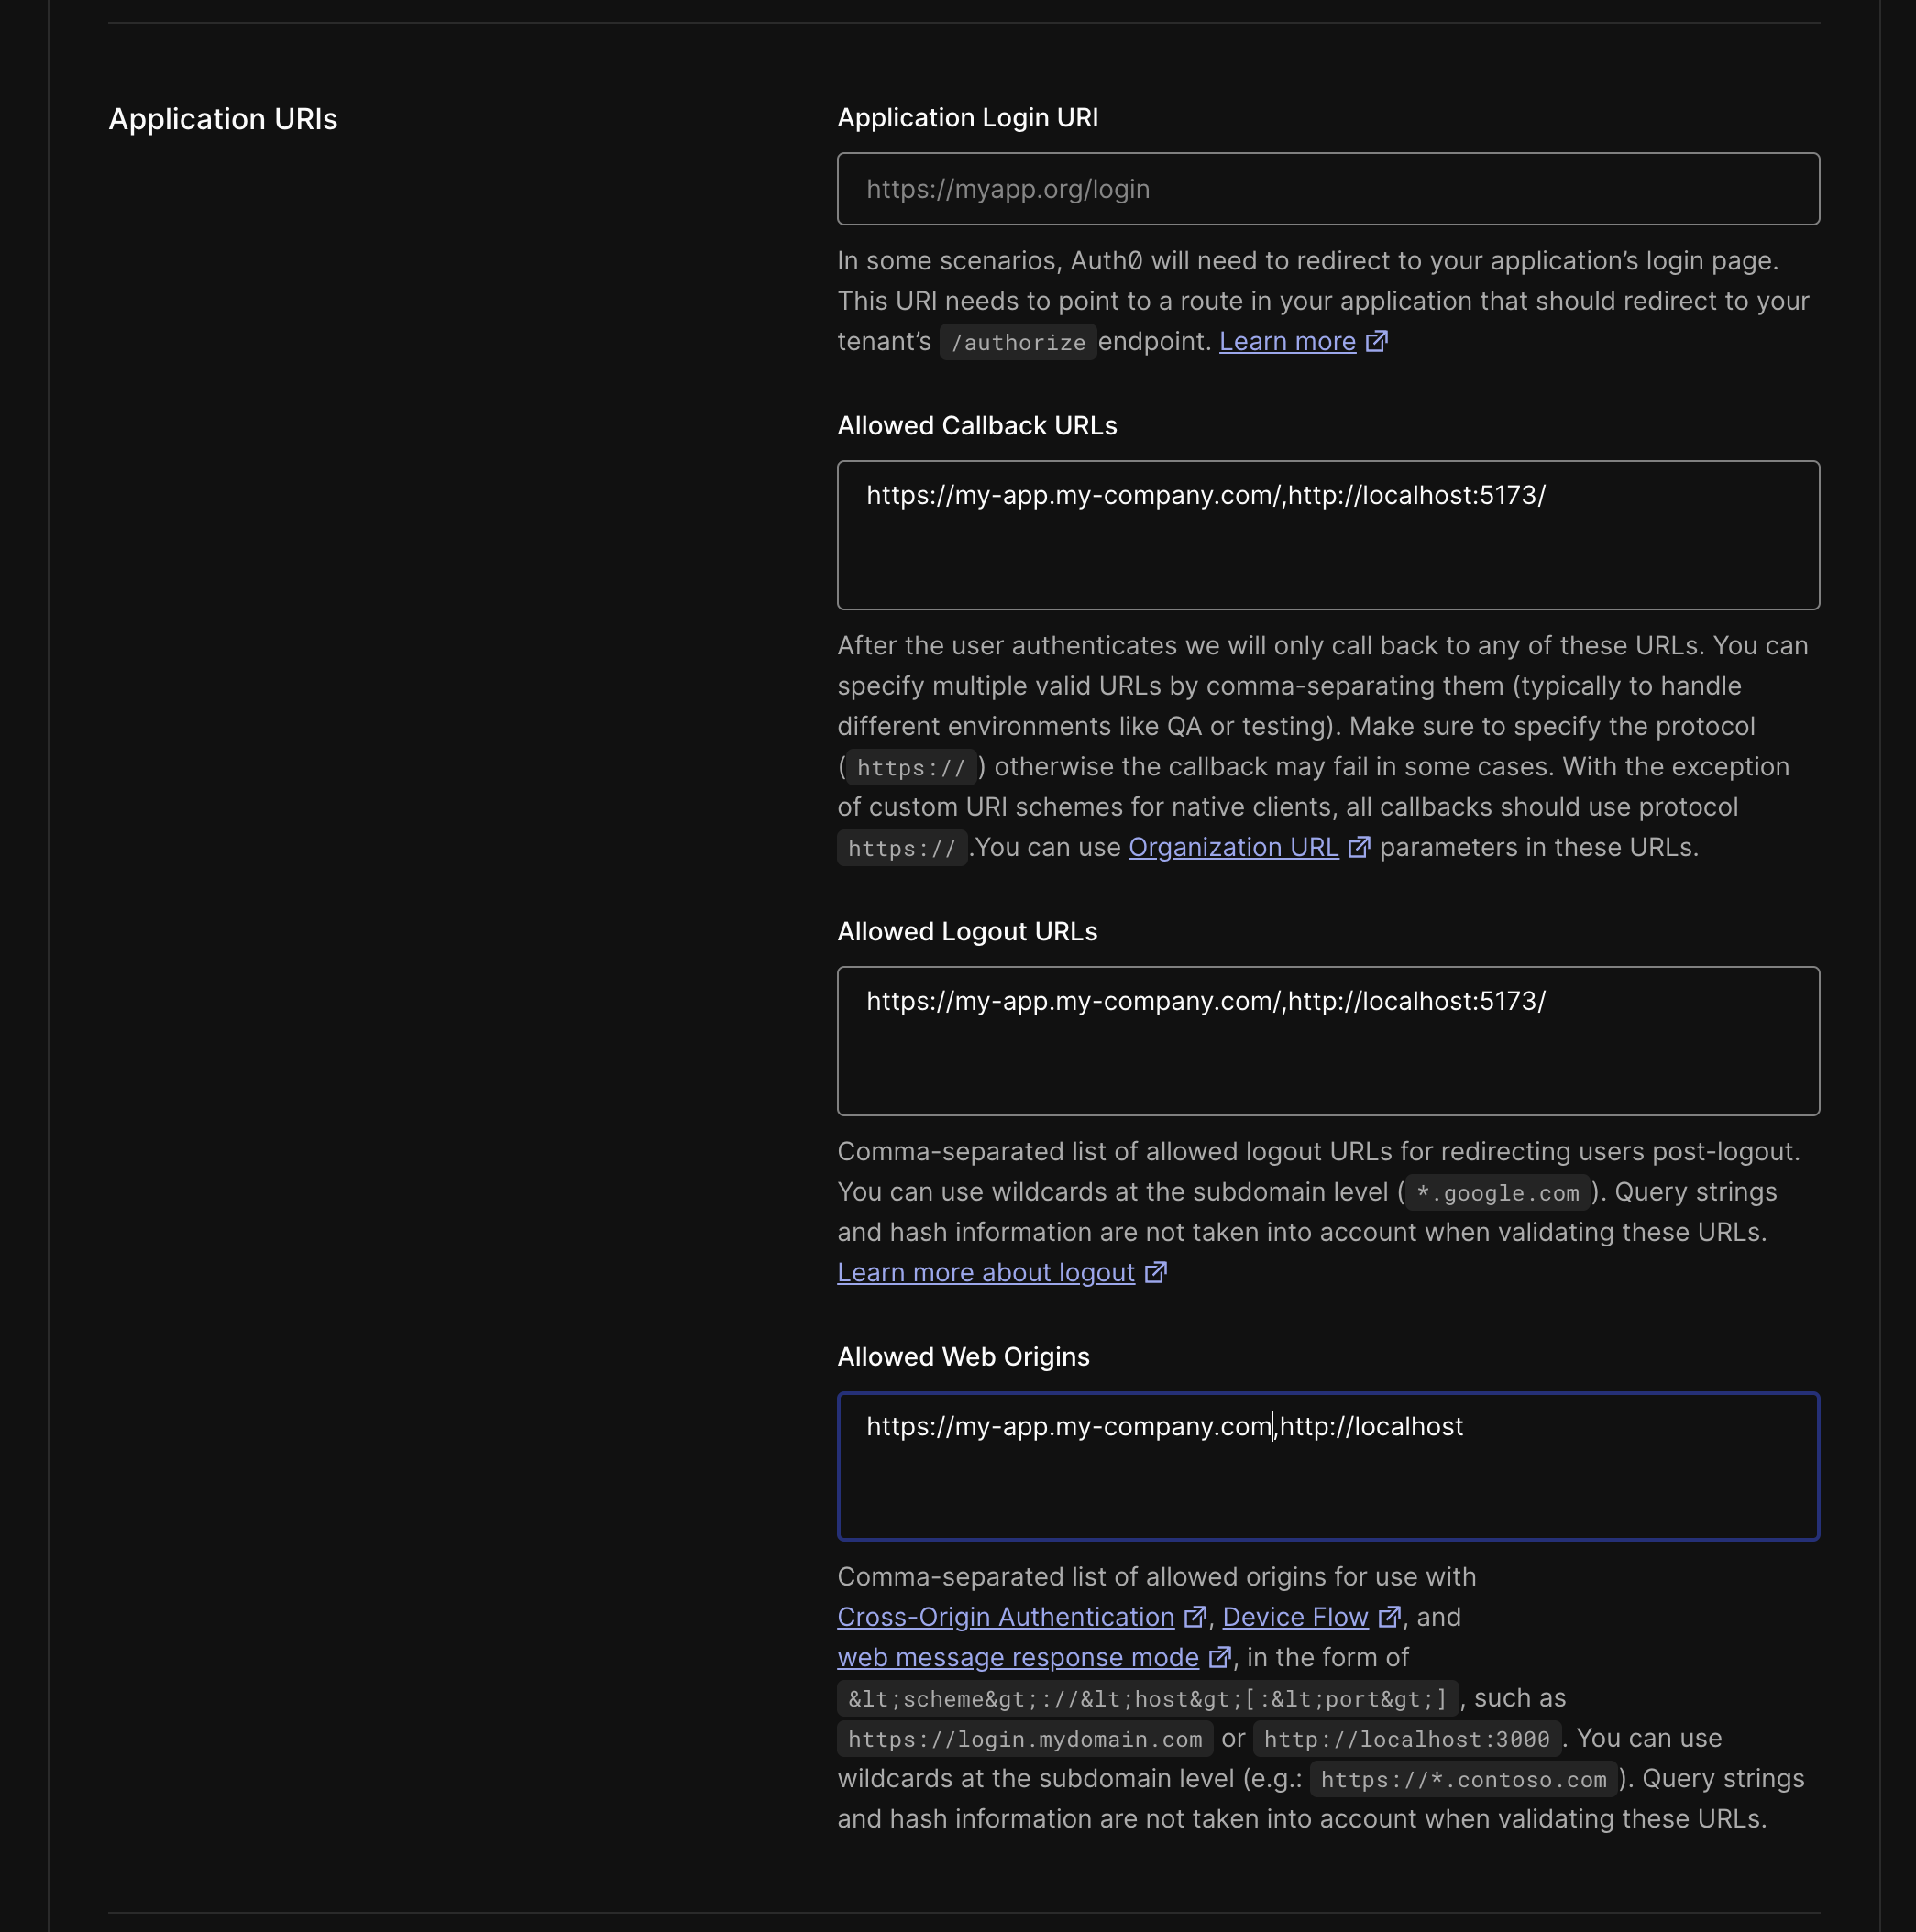
Scroll to the Application URIs section. Set two Allowed Callback URLs:
https://my-app.my-company.com/(include trailing slash; adjust if hosted under a subpath, e.g.,https://my-company.com/my-app/)http://localhost:5173/(include trailing slash; adjust based on your dev server)
Allowed Logout URLs: Copy paste what you put into Allowed Callback URLs
Allowed Web Origins: The origins of the Callback URLs
Click Save Changes
Copy the Client ID


Creating an API
If you need Auth0 to issue a JWT access token for your API, follow these steps:
Navigate to Auth0 Dashboard.
In the left panel, go to Applications → APIs.
Click Create API.
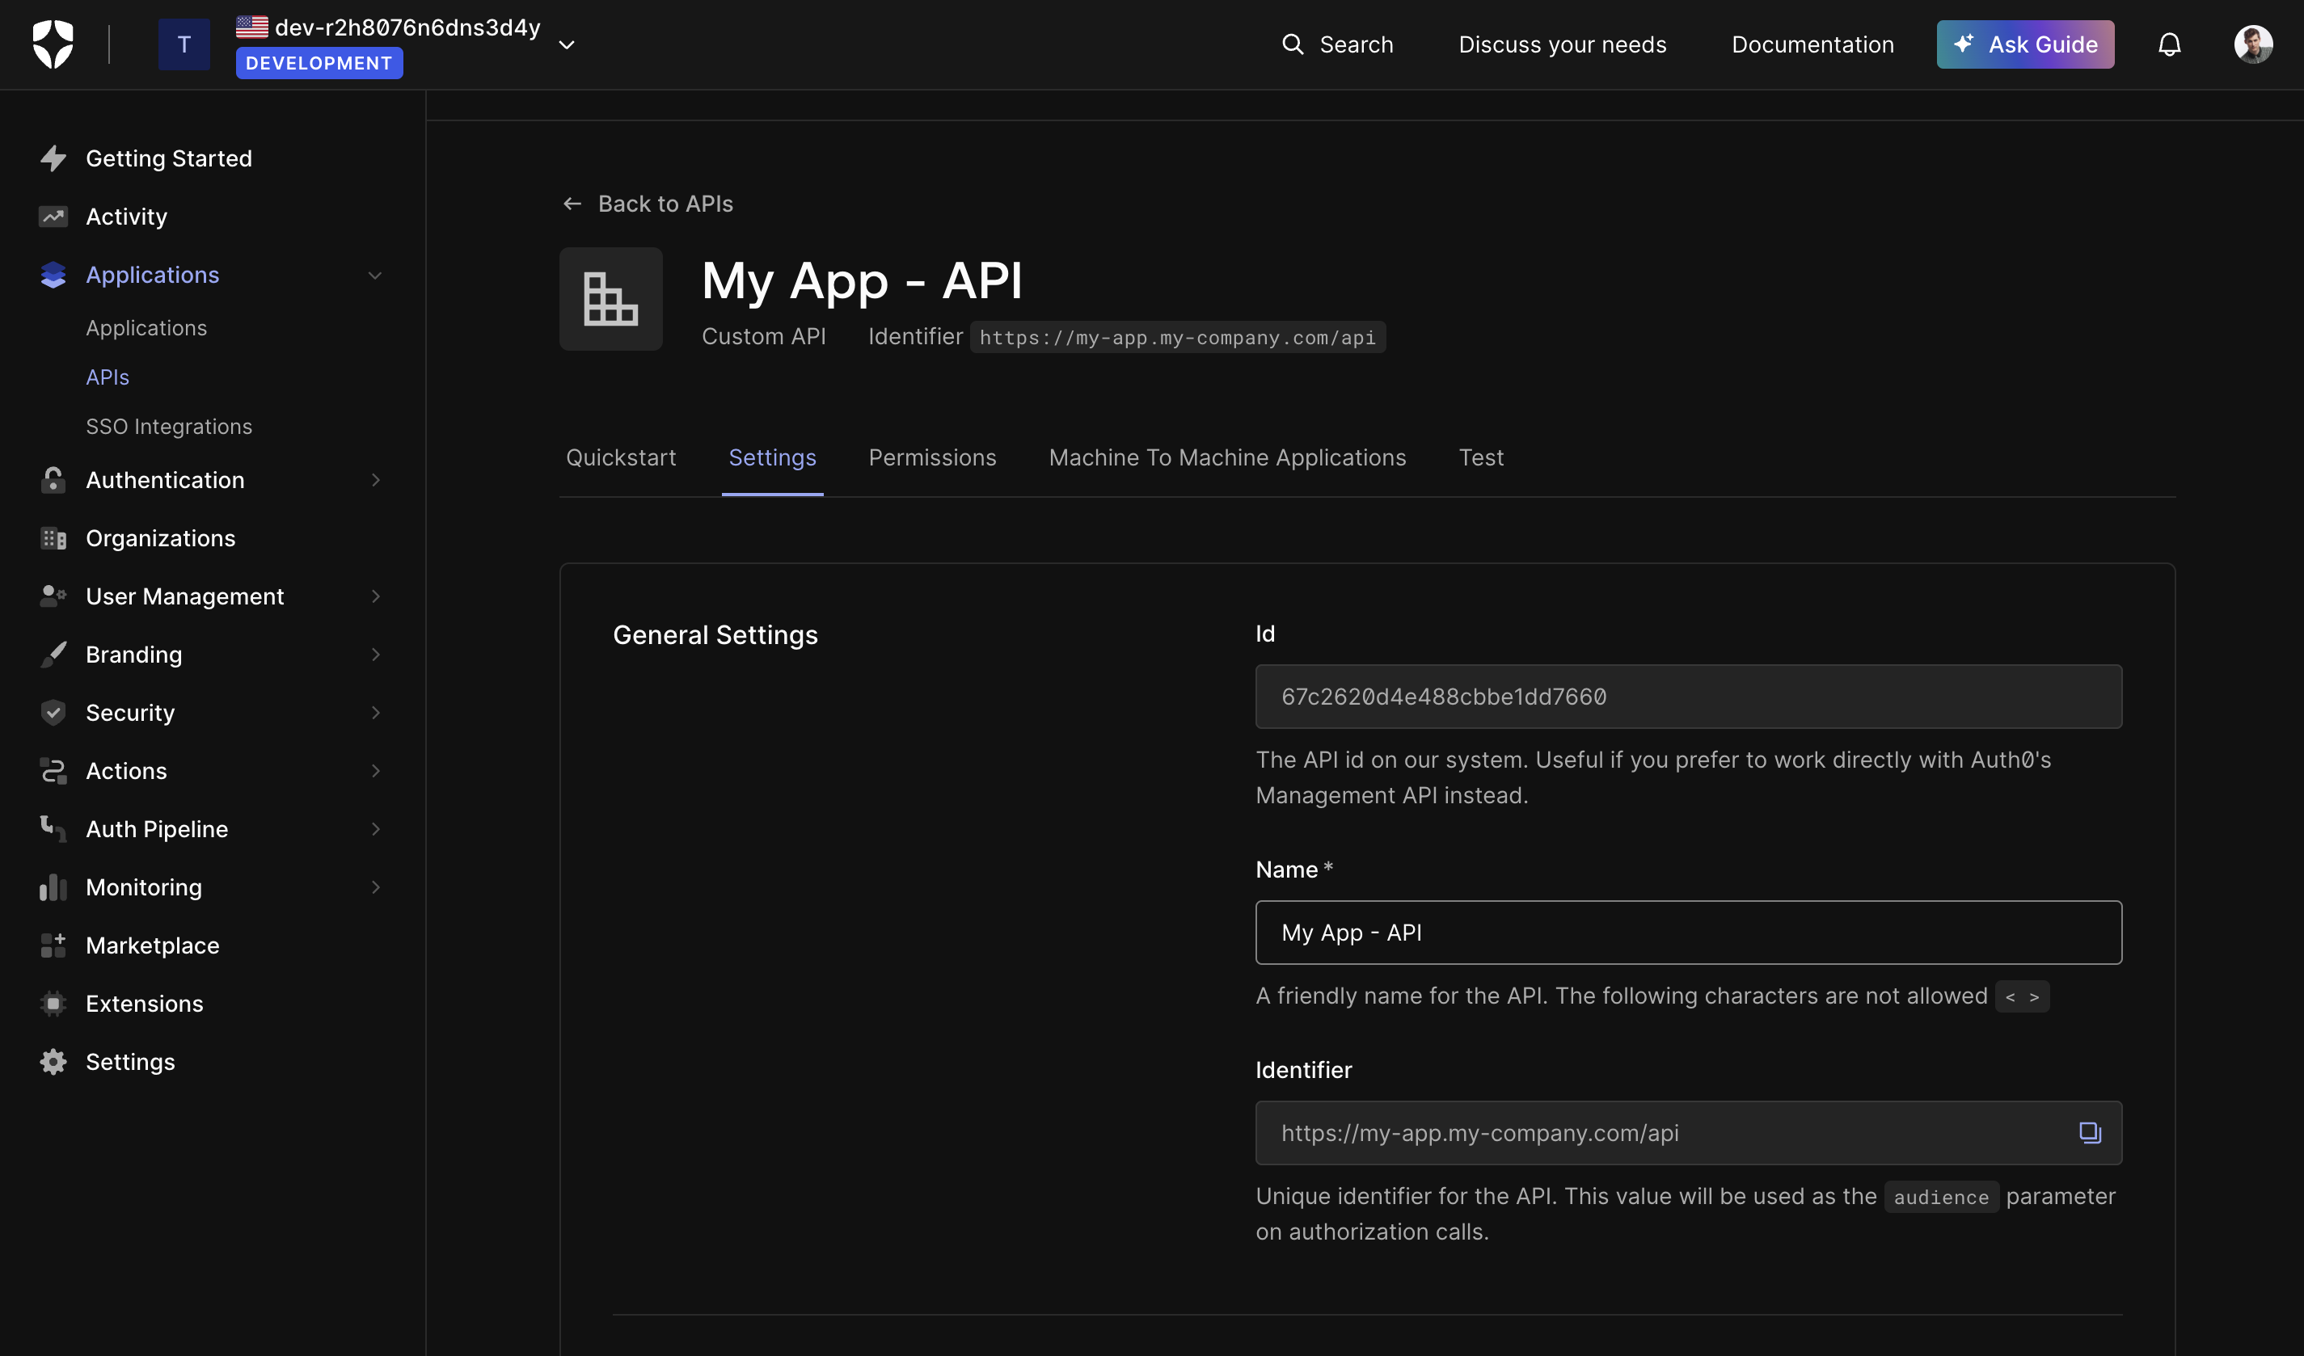
Navigate to the Settings tab
Fill up Identifier: Ideally, use your API's root URL (e.g.,
https://myapp.my-company.com/api). However, this is just an identifier, so any unique string works. Copy it, it is your audience (aud claim in the access token's JWT)Under Access Token Settings: We want to reduce the lifespan of the access token, the 24 hour default is non acceptable for an SPA usecase.
Maximum Access Token Lifetime:
5 minutes(300 seconds), can be even shorter. It only need to be valid for the duration of transit from the frontend to the backend.Implicit/Hybrid Flow Access Token Lifetime:
5 minutes– required to save settings, even if unused.
Click Save

(Optional) Configuring Auto Logout
If you want users to be automatically logged out after a period of inactivity, follow these steps.
When and Why Enable Auto Logout?
For security-critical applications like banking or admin dasboards users should:
Log in on every visit.
Be logged out after inactivity.
This prevents unauthorized access if a user steps away from their device.
For apps like social media or e-comerce shop on the other hand it's best not to enable auto logout.
Configuring Session Expiration in Auth0
Navigate to Auth0 Dashboard.
Click Settings in the left panel.
Open the Advanced tab.
Configure Session Expiration:
Idle Session Lifetime:
30 minutes(1800 seconds) – logs out inactive users. Copy the value in seconds this will be youridleSessionLifetimeInSeconds.Maximum Session Lifetime:
14 days(20160 minutes) – ensures active users stay logged in.
Since Auth0 does not issue refresh tokens (or issues non-JWT ones), inform oidc-spa of your settings:
Providing the Parameters to oidc-spa
Last updated
Was this helpful?